Faydalı Bilgiler
WordPress Site Hızlandırma
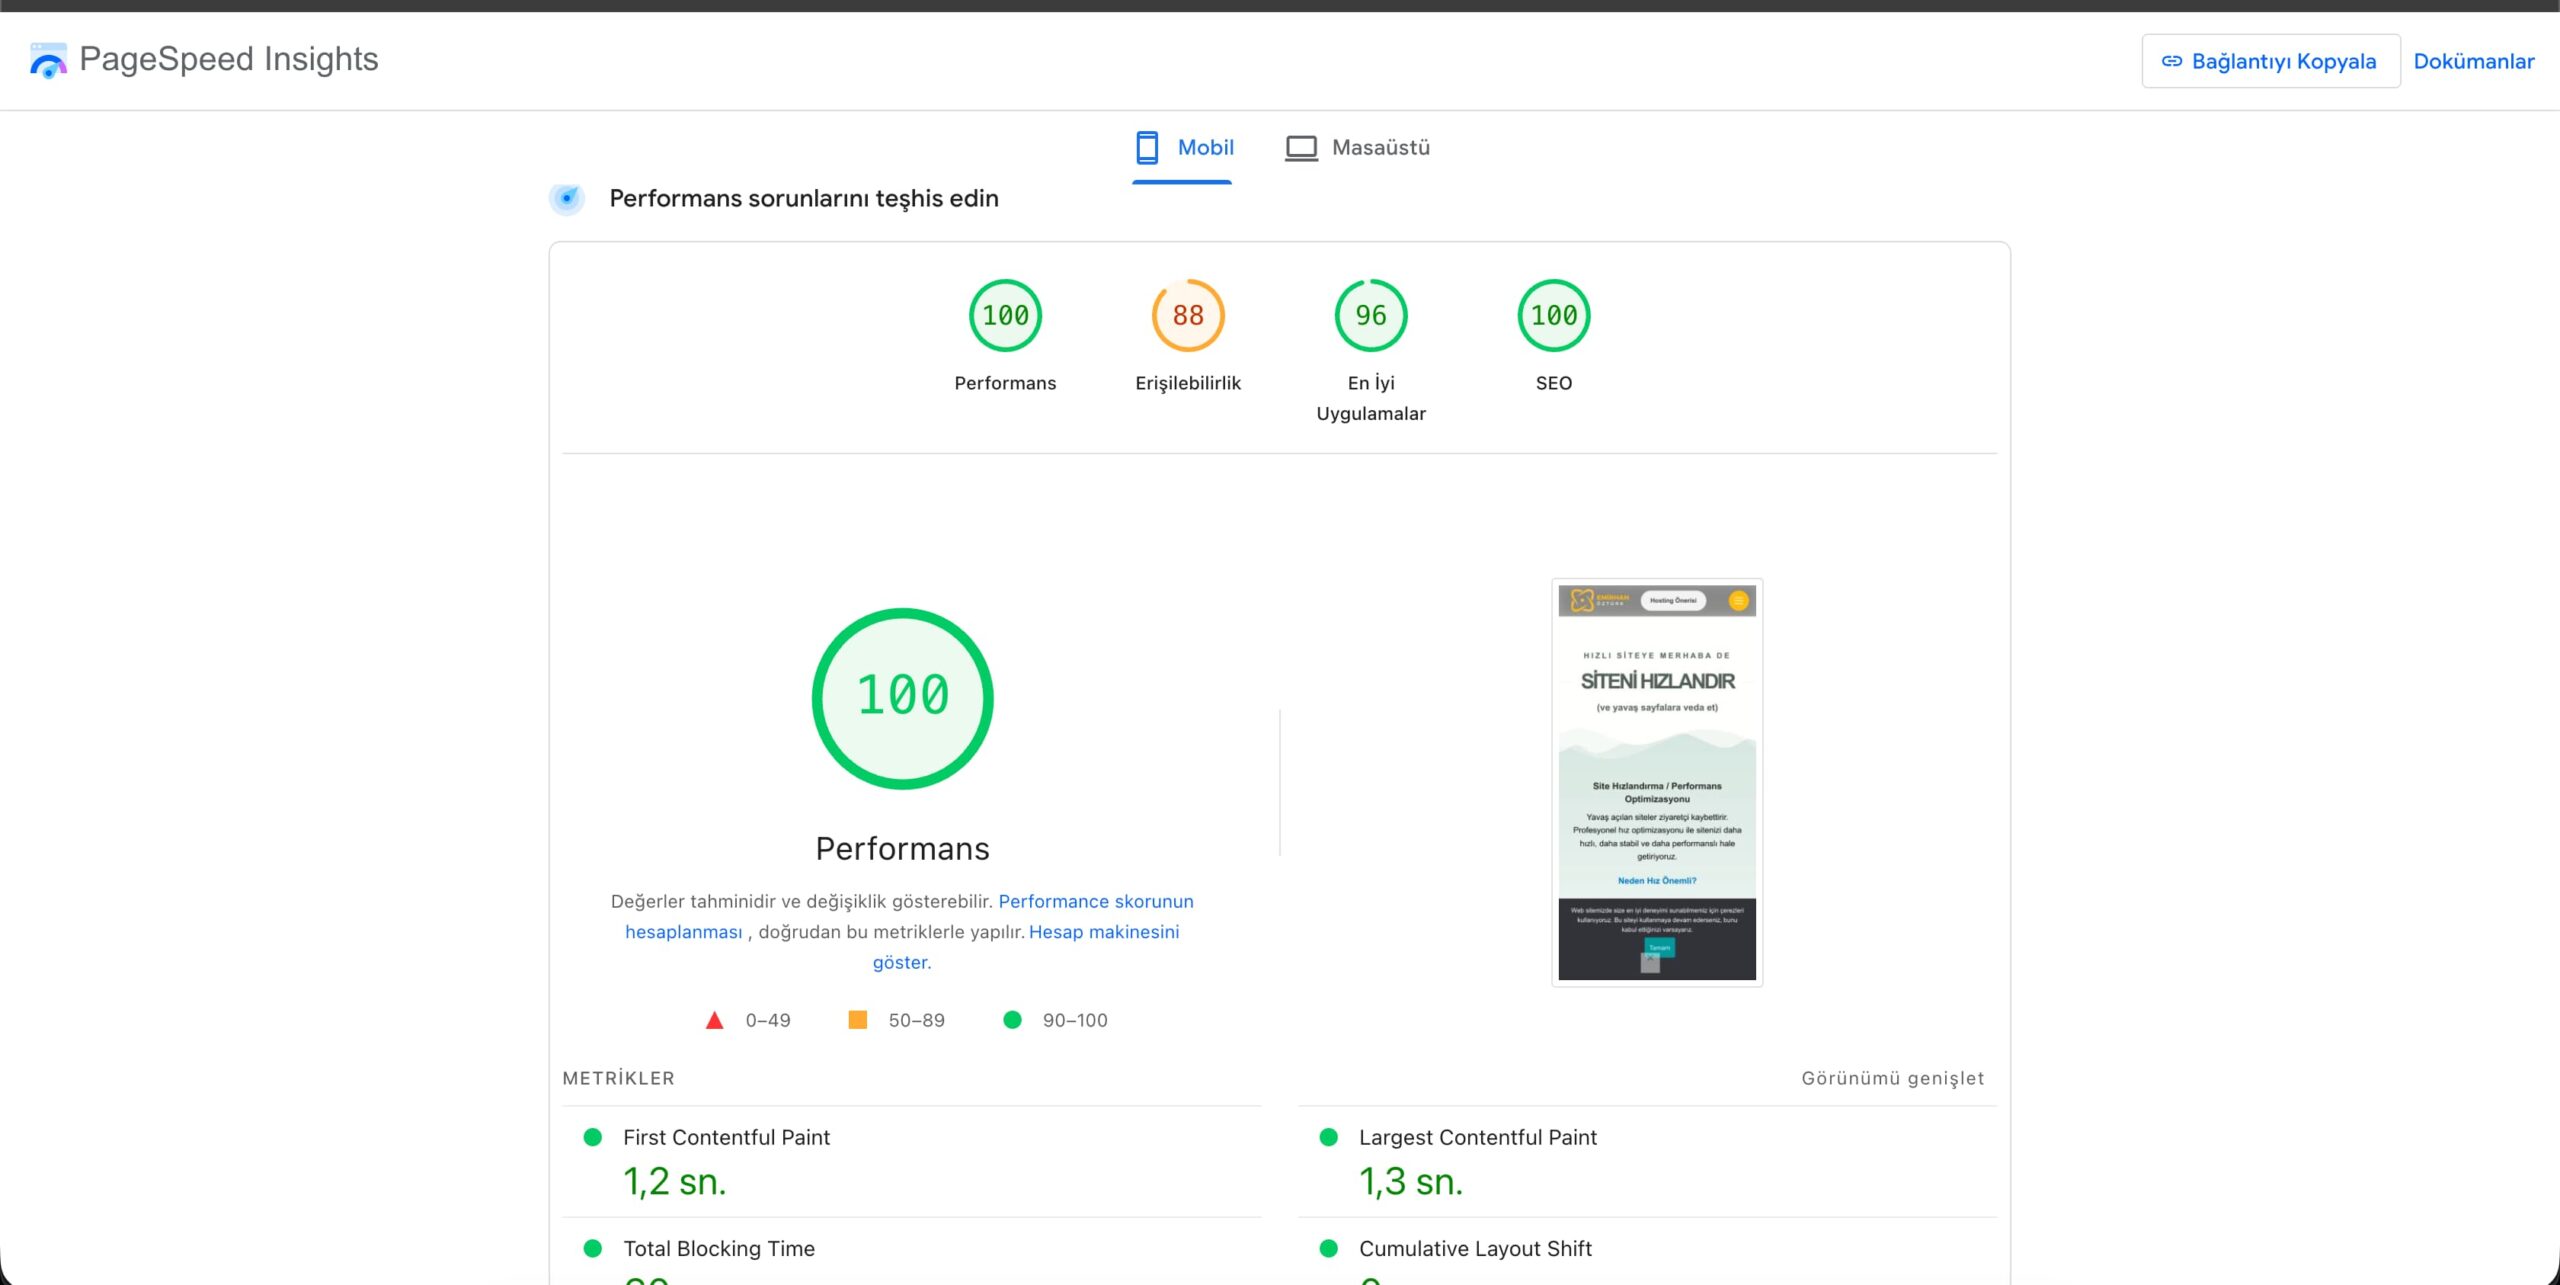
Web siteleri artık bilgi aktaran sayfalardan çok daha fazlası. Hız, ziyaretçilerin kalma süresini; kalma ...
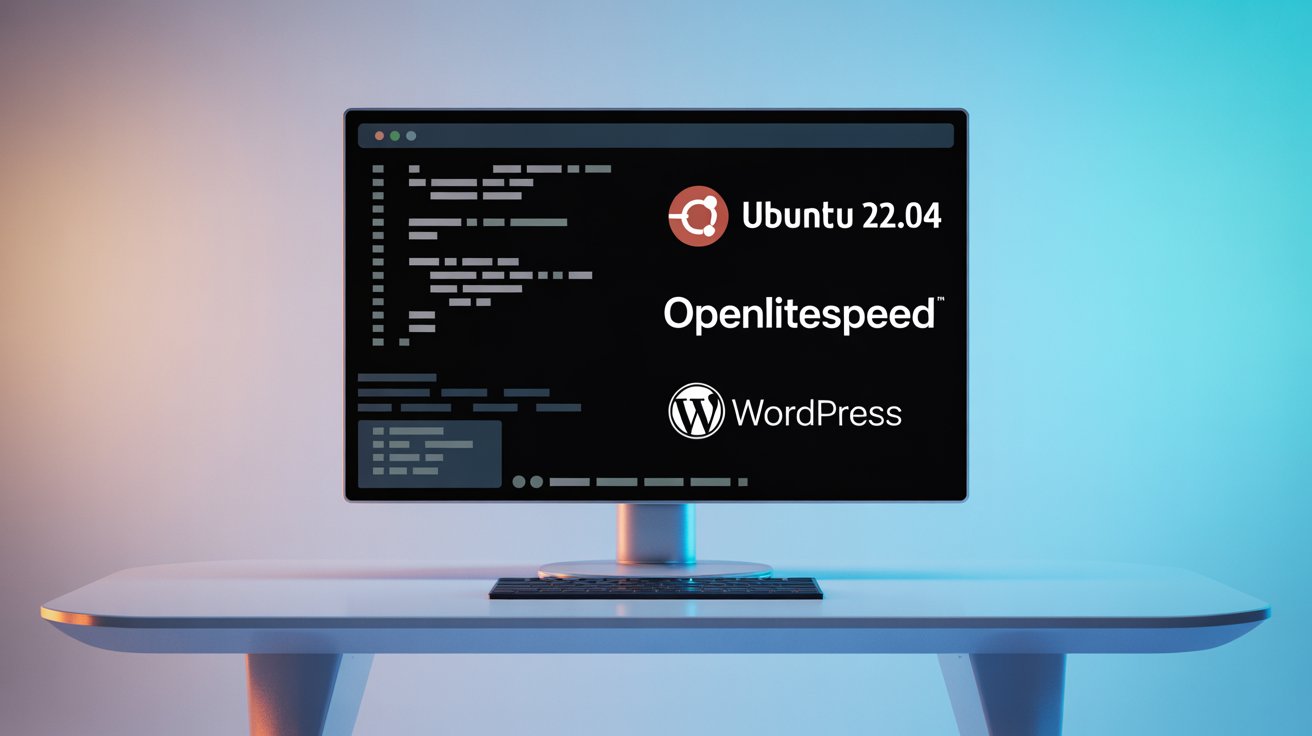
WordPress VPS Sunucu Kurulumu
Adım Adım Wordpress Sunucu Kurulumu ve Yapılandırması
Bu yol haritası, Ubuntu 22.04 üzerinde OpenLi...